Configure the Outbound Event in Bomgar
Note: This functionality is only available if you have applied the Bomgar
Integration
mApp™ Solution.
For more information, refer to the
mApp Solution Tech Notes documentation.
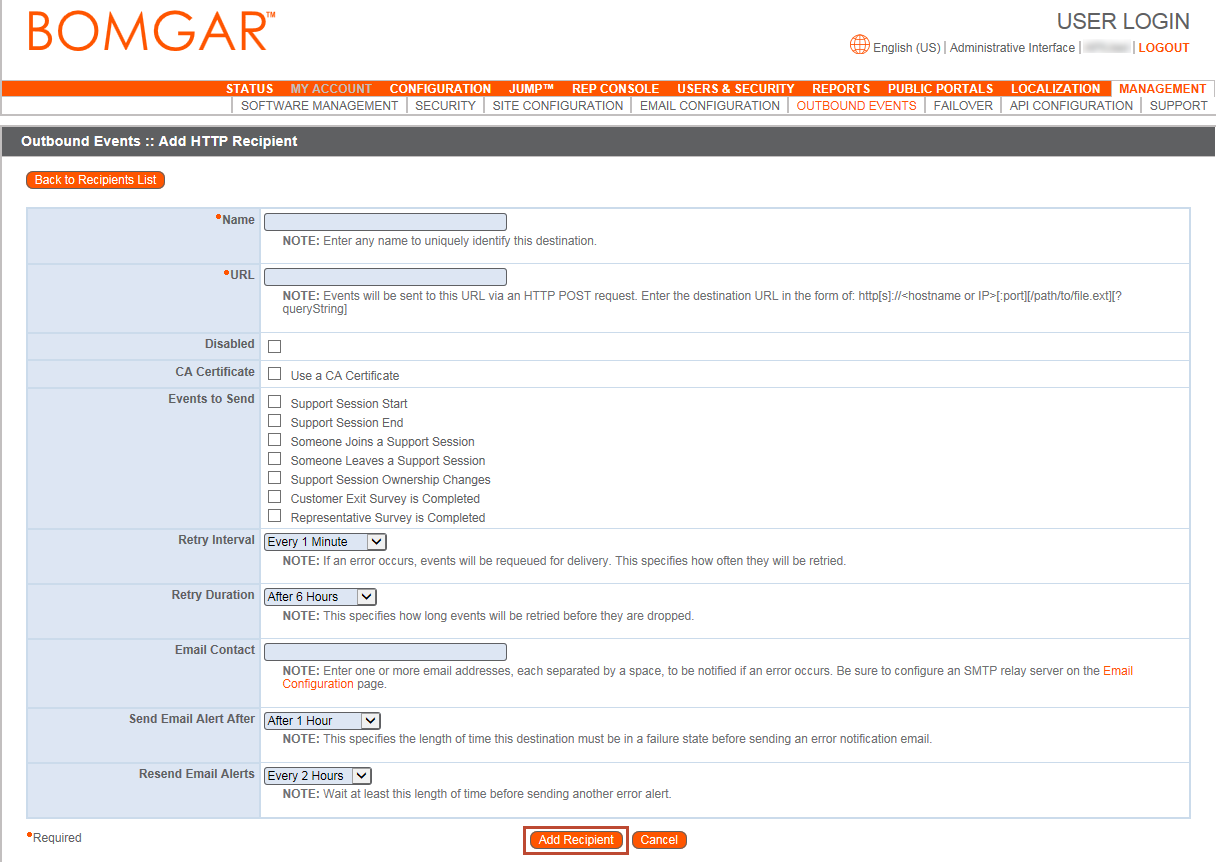
To configure the Outbound Event in Bomgar:
-
Click
Add New HTTP Recipient.
- Provide the Name.
- Provide the URL (example: https://YOURCHERWLLSERVER/CherwellAPI/api/V1/savebomgarsessionid)
- Add Recipient.
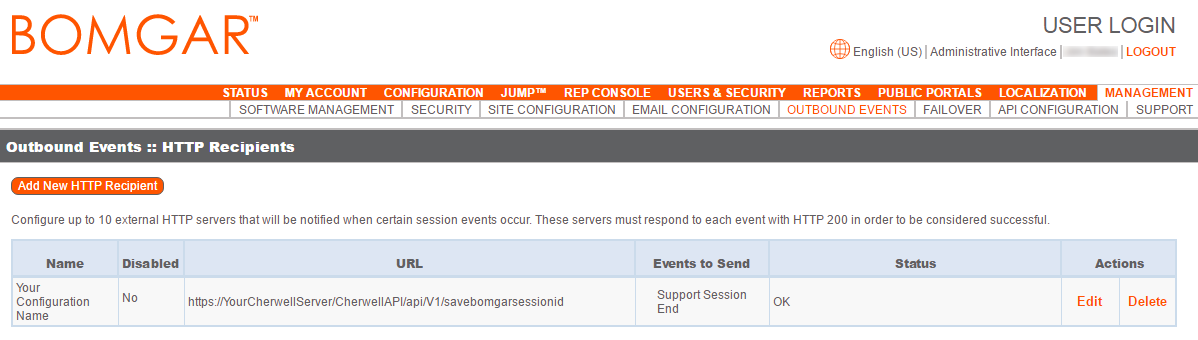
 The newly created HTTP Recipient shows on the Outbound Events page.