Define Self-Service Portal Knowledge Search Options
Use Knowledge Mapping to determine what Knowledge Sources can be searched using the Legacy Self-Service application.
Good to know:
- Self-Service Knowledge Mapping not apply to the new CSM Portal.
- Users must define Knowledge Sources using the Knowledge Source Manager before adding them to the Knowledge Sources list.
- The legacy Self-Service application only supports the use of Knowledge with Incidents, which is why there are no options for specifying an alternate target Business Object.
- In the Legacy Self-Service application, when a Knowledge Search is launched, the User can select a category that will be used to further the limit the search. The field listed is a field on the Incident Business Object that is validated based on a list of possible categories.
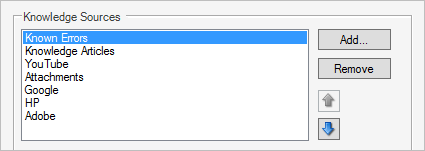
- Select a Knowledge Source and click Remove to remove it from the list. Select a Knowledge Source and click the Up/Down buttons

 to organize the items in the list.
To add Legacy Self-Service Knowledge Sources:
- Open the Knowledge Mapping window.
- From the Search From drop-down, select Self-Service.
OOTB Knowledge Sources open in the window.
- Define a category and subcategory to further limit the Search.Note: In the Legacy Self-Service application, when a Knowledge Search is launched, the User can select a category that will be used to further the limit the search. The field listed is a field on the Incident Business Object that is validated based on a list of possible categories.
- Add Knowledge Sources that you want available for Self-Service Searches:
- Click the Add button.
The Knowledge Source Manager opens.
- Click a Knowledge Source.
Click OK.
The Knowledge Mapping window opens displaying in the Knowledge Source list.
- Click the Add button.
- Define Known Error solution options (where found Known Error solutions should be placed):
- Field: Select this check box to place the data from the solution field in a field within the target Incident Business Object.
- Journal entry: Select this check box to create a new Journal entry on the target Incident Business Object and the data from the solution field is used for the Journal text.
- Attachment: Select this check box to add the solution as an Attachment to the target Business Object and appears on the Attachment Bar.
- Relationship: Select this check box to add the solution to an existing relationship on the target Business Object (ex: There is typically relationship between Incident and Problem; If a Problem is found, it will be added to the relationship between the two Objects).
Click OK.