Create a Mobile Dashboard
Use the Mobile Dashboard window (within the Mobile Dashboard Manager) to create and edit Mobile Dashboards. When you create a Mobile Dashboard, you define:
- General properties: Name, description, title text, and theme.
- Which Widgets to add to the Dashboard.
Note: Remember, only certain types of Widgets can be used on Mobile
Dashboards (ex: Charts, Gauges, Matrixes, and Search Results List).
Note: Mobile Alert Dashboards are special because they use only Widgets that have alert states. For more information, see Create a Mobile Alert Dashboard.
To create a Mobile Dashboard:
- Open the Mobile Dashboard Manager.
- Click the
Create New button
 .
.
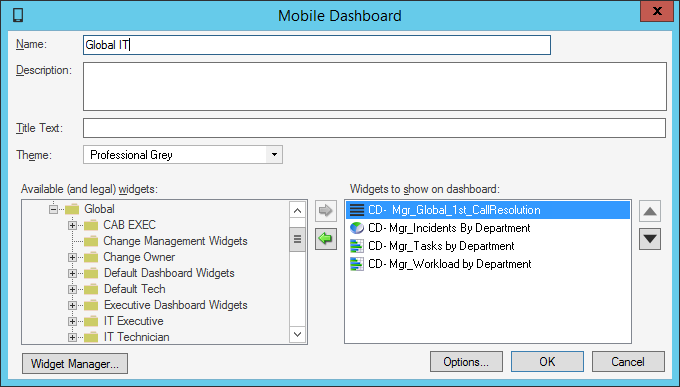
- Define general properties for the Mobile Dashboard:
- Name:
Provide a display name to use within CSM (this property can be searched in CSM Item Managers).
- Description:
Provide a description to use within CSM (this property can be searched in CSM Item Managers).
- Title Text:
Provide the text to display at the top of this Dashboard. If this is blank, the Dashboard name is used as a title.
- Theme:
Select a Theme (set of fonts, colors, and options) to be used by different elements. Using a Theme simplifies the cohesive look. You can change the Theme at any time, which automatically updates the various elements.
- Name:
- Select which Widgets to add on the Dashboard.
- In the Available (and Legal) Widgets area, select Widgets from
the Widgets tree.
- Click the Widget Manager button to open the Widget Manager and edit available Widgets.
- Click the
right-arrow button
 to add the selected Widget to the Dashboard.
Tip: Click the left-arrow button
 to remove a selected Widget from the Dashboard.
- In the Widgets to Show on Dashboard area, click the
Up/Down arrows to change the order of
selected items.
- Click the Options button to define advanced options for a selected Widget.
- In the Available (and Legal) Widgets area, select Widgets from
the Widgets tree.
-
Click OK.