Splunk Integration
Overview
Splunk® Enterprise (referred to as Splunk) is an OOTB built-in integration that offers data analysis and monitoring. Splunk integrates so that Users can log data from CSM directly into Splunk..
How Integration Works
Splunk is an application that captures logging information and makes it searchable and easier to read. CSM connects to a Splunk server, and then sends logging information to Splunk. The logging information is viewed by connecting and launching the Splunk application.
Recommendations
- Go to the Splunk website and setup an account with Splunk. This provides a Username and Password.
- Install Splunk on a workstation prior to beginning an integration with CSM.
Steps to Integrate
The steps to integrate Splunk with CSM are performed in both the CSM Client and CSM Server Manager.
To configure Splunk in CSM Client:
- In
CSM Client, go to Tools > Options.
The Options window opens.
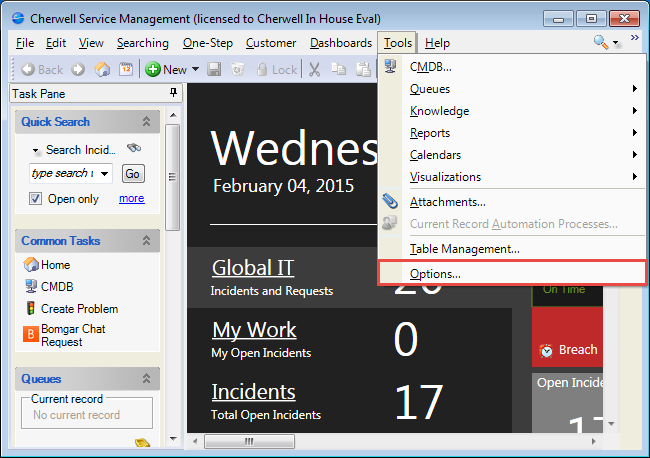
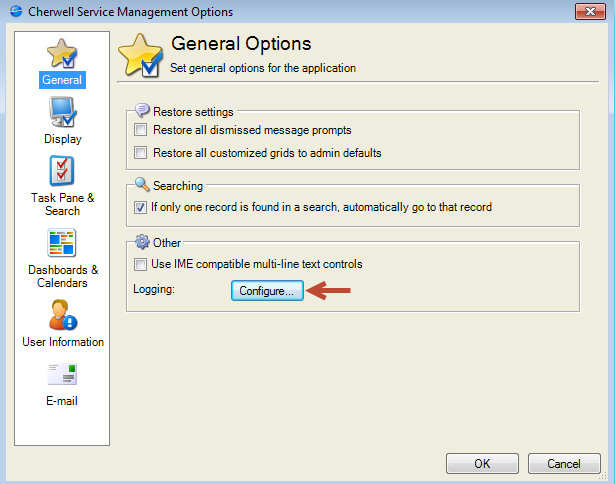
- On the General Options page, click
Configure.
The Logging Options window opens.
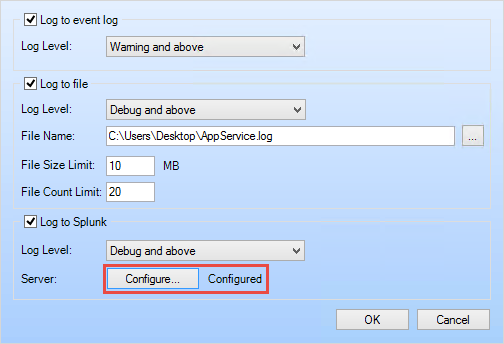
- Select the
Log to Splunk check box.
Next to Server it shows Not Configured.
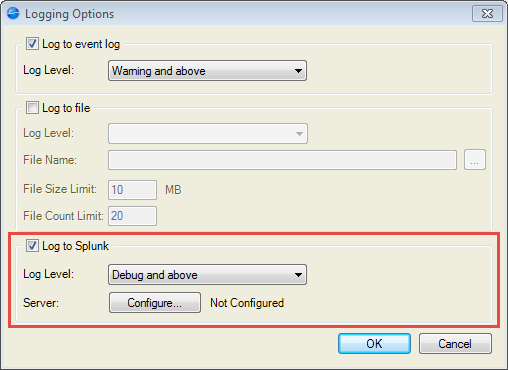
- In the Log Level drop-down, select an option.
- Click
Configure.
The Splunk Server Settings window opens.
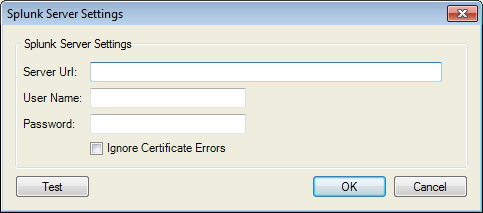
- Define the following settings:
- Server URL: Provide the URL of the Splunk Server (example: https://splunkserver:8089).
- User Name: Provide the user name for the Splunk Server acount.
- Password: Provide the password of the individual with an account on the Splunk Server.
- Ignore Certificate Errors: Select this check box to ignore certificate errors that might be generated by Splunk using self-signed certificates to encrypt data. Select this check box only if you trust your connection with the server.
-
Click OK.
The Splunk Server Settings window closes and next to Server displays Configured.
To configure Splunk in Cherwell Server Manager:
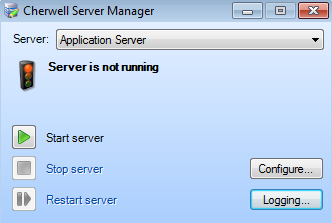
- Click Start>All Programs>Cherwell Service Management>Tools>Server Manager.
- Click
Logging.
The Cherwell Application Server Logging Options window opens.
- Select the
Log to Splunk check box.
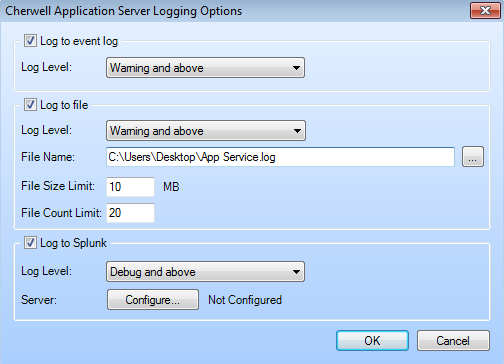
- In the Log Level drop-down, select an option.
The Server section shows Not Configured next to the Configure button until the configuration is complete.
- Click
Configure.
The Splunk Server Settings window opens.
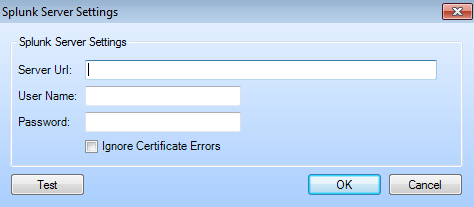
- Define the following settings:
- Server URL: Provide the URL of the Splunk Server (example: https://splunkserver:8089).
- User Name: Provide the user name for the Splunk Server acount.
- Password: Provide the password of the individual with an account on the Splunk Server.
- Ignore Certificate Errors: Select this check box to ignore certificate errors that might be generated by Splunk using self-signed certificates to encrypt data. Select this check box only if you trust your connection with the server.
-
Click OK.
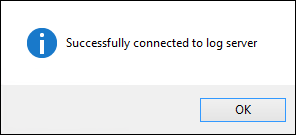
A confirmation window for a successful connection opens.
-
Click OK.
The Splunk Server Settings window closes and to view to the Cherwell Application Server Logging Options window. Configured shows next to the Configure button.
-
Click OK.