Configure Global/Role Cherwell Mobile Settings
Use the Mobile Configuration window in CSM Administrator to configure how Cherwell Mobile looks and behaves on mobile devices, Globally or by Role. You can configure which:
- Mobile Home Dashboard to display by default.
- Mobile Alert Dashboard to display by default.
- Business Objects to make available. Associated Search Groups will also be available.
- Actions/One-Step Actions to make available for each Business Object.
To configure Global/Role Cherwell Mobile settings:
- In the
CSM Administrator main window, click the
Browser and Mobile category, and then click the
Edit Mobile Configuration task.
The Mobile Configuration window opens, listing the available Roles (Default is a global default, is always defined, and applies for all Users/Roles unless overridden). The small green check mark indicates that settings have been configured for a particular Role.
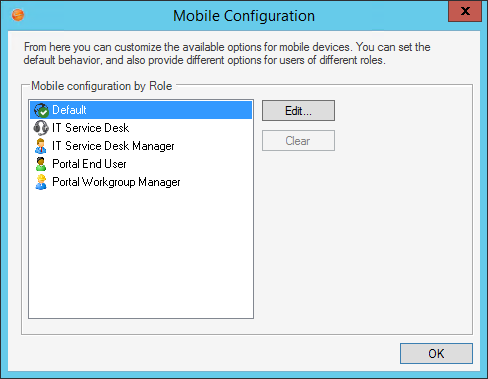
- Click
Default (Global) or a
Role, and then click the
Edit button.
Note: Our example uses Global. If you select a Role, you have the option to override the Global default and configure Cherwell Mobile settings from scratch.
Tip: Click the Clear button to clear configured settings for a selected Role. If no defaults are configured for a Role, members of that Role see the Global default settings (which cannot be cleared).
The Mobile Access Setup window opens, listing the objects (Dashboards and Business Objects) currently being displayed on mobile devices.
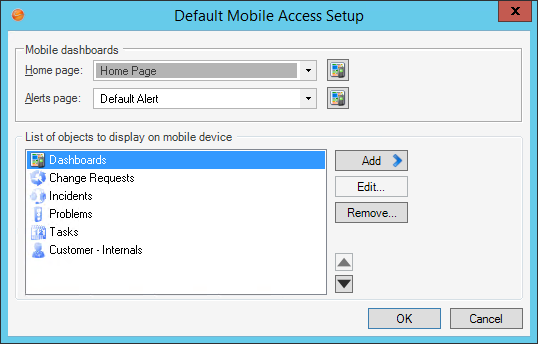
- Select default Mobile Dashboards (Home and Alert):
Tip: If you do not want to display any Dashboards, remove the Dashboard item from the List of Objects to Display on Mobile Device list.
- Home Page: Select a default Mobile Home Dashboard.
- Click the drop-down to select from a list of recently used Mobile Dashboards.
- Click the
Mobile Dashboard button
 to open the
Mobile Dashboard
Manager, and then select an existing Mobile Dashboard or
create a new
Mobile Dashboard.
to open the
Mobile Dashboard
Manager, and then select an existing Mobile Dashboard or
create a new
Mobile Dashboard.
- Alerts Page: Select a default
Mobile Alert
Dashboard.
- Click the drop-down to select from a list of recently used Mobile Dashboards
- Click the
Mobile Dashboard button
to open the Mobile Dashboard Manager, and then
select an existing Mobile Alert Dashboard or create a new Mobile Alert
Dashboard.
- Home Page: Select a default Mobile Home Dashboard.
- Select the Business Objects to make available in
Cherwell Mobile:
Important: In order for a Business Object to be available, it must have the Show in Search Manager property set (in the Business Object properties within a Blueprint).
- Override List of Objects to Display on Mobile Device: Select this check box to override the current Global default list of Business Objects. This check box does not appear when configuring Global defaults because there is nothing above them to override.
- Click
Add, and then select the
Business Object to make available on mobile
devices.
Tip: Click Edit to edit a selected item. Click Remove to remove the selected item from the list.
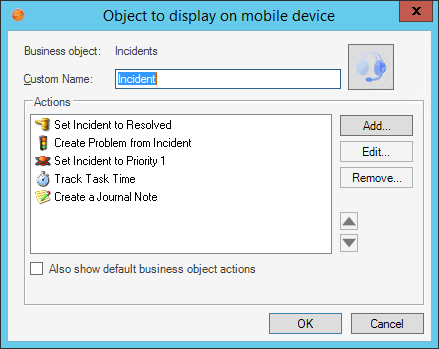
- Define how to display the Business Object in
Cherwell Mobile:
- Custom Name: Provide a display name to use in Cherwell Mobile. If blank, the Business Object name is displayed.
- Custom Image:
Click the Image button to open the Image Manager, and then select an existing image or import a new image to represent the item in the UI.
If no image (None) is selected, the default image for the Business Object is displayed.Android: Android devices use standard color images. For the best results, use the images in the BusObs>32x32 folder in the Image Manager. If you are setting up a mobile configuration for use on both Android and iOS devices, use the iPhone-specific images. They will be automatically mapped to equivalent standard images for non-iOS devices.
- Select the Actions/One-Step Actions to make available in
Cherwell Mobile:
- Click
Add to add a new Action/One-Step Action to the list.
Tip: Click Edit to edit a selected item. Click Remove to remove the selected item from the list. Use the Up/Down arrows

 to change the order of the Actions/One-Step Actions when displayed in
Cherwell Mobile (ex: In the Actions list).
to change the order of the Actions/One-Step Actions when displayed in
Cherwell Mobile (ex: In the Actions list).
- Define additional options for the list of Actions:
- Also Show Default Business Object Actions: Select this check box to also make available any default Actions for the Business Object. This option is only available if the Business Object has default Actions available (ex: Approvals have built-in functionality to approve, deny, and abstain).
- Also Show Global Actions: Select this check box to make
available any Actions that were defined for the Business Object as part of the
Global default settings.
Note: This option is available only if you are configuring settings for a Role.
- Click
Add to add a new Action/One-Step Action to the list.
- Configure the order of the Actions when displayed in
Cherwell Mobile (ex: On the Actions popup list):
- Use the
Up/Down arrows
to order the Actions.
- Use the
Up/Down arrows
-
Click OK.