Create a Service/SLA/Priority Structure
To create a Service, SLA, Priority structure:
- Design a three-tier Categorization for each Service.
- Complete your own SLA/Priority Spreadsheet.
- Create one or more SLAs:
Tip: CSM provides a default SLA, named Corporate. Consider using this SLA for all Incidents/Requests. If needed, change the Target Times to meet your needs.
- Create a new SLA by clicking
File>New>New SLA
from the
CSM Desktop Client menu bar or by clicking
New>New SLA
on the
CSM Desktop Client toolbar.
A new SLA Record is created with a Status of New.
- Complete the SLA fields. The Title and SLA Type are required to
save the record.
Note: For detailed field information, refer to the SLA Form documentation.
- Plan your SLA:
- In the Status alert bar, click
Set to Planning.

The SLA status changes to Planning.
- In the Status alert bar, click
Set to Planning.
- Define your SLA Target Times:
- Click the SLA Target Times tab (Form Arrangement area).
- Click
New SLA Target Time.
The New SLA Target Times form opens.
Note: For detailed field information, refer to the Target Times Form documentation.
Notes: By default, the Target Times form uses a wizard interface that provides helpful information for creating Target Times. To bypass the Target Times wizard and complete the information using one form, select the Disable Target Time Wizard radio button under Advanced Options in the Main Pane.
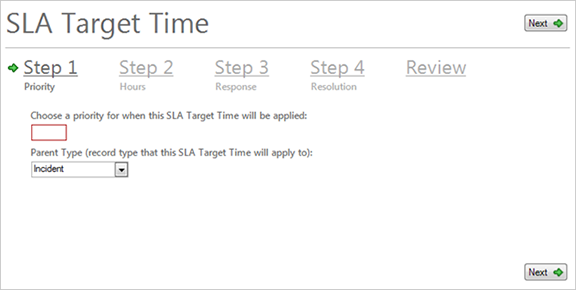
- Select/define your Priority and parent type.
- Click the
Next button
 and define your Work Hours.
- Click the
Next button
and define your Response Time.
- Click the
Next button
and define your Resolution Time.
- Add values to your Priority Matrix:
- Click the Priority Matrix Element tab (Form Arrangement area).
- Click
New Priority Matrix Element.
The Priority Matrix Element form opens.
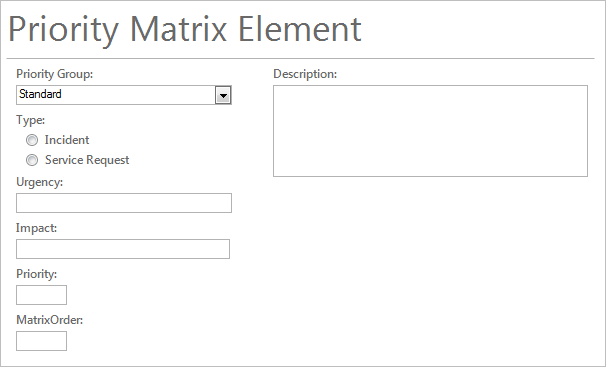
- Define the priorities.
Note: For detailed field information, refer to the Priority Matrix Element form documentation.
- Create a new SLA by clicking
File>New>New SLA
from the
CSM Desktop Client menu bar or by clicking
New>New SLA
on the
CSM Desktop Client toolbar.
- Activate your SLA:
- In the Status alert bar, click
Active.

- In the Status alert bar, click
Active.
- Create one or more Services:
- Create a new Service by clicking
File>New>New Service
from the
CSM Desktop Client menu bar or by clicking
New>New Service
on the
CSM Desktop Client toolbar.
A new Service Record is created with a Status of Planning.
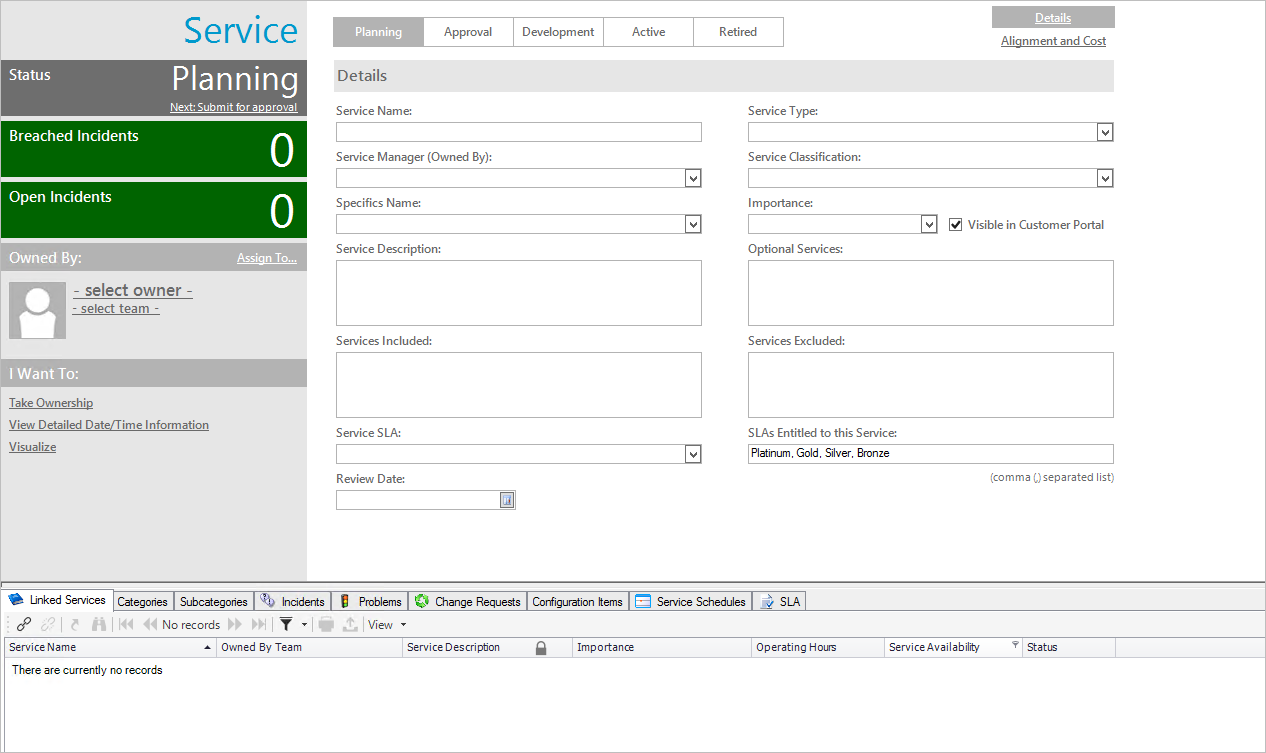
- Define the Service fields.
Note: For detailed field information, refer to the Service Form documentation.
- Define the Service Categories:
- Click the Categories tab (Service Form Arrangements area).
- Click
New Category.
The Category form opens.
- Complete the fields.
Note: For detailed information, refer to the Service Form documentation.
- Define the Service Subcategories:
- Click the Subcategories tab (Arrangements area).
- Click
New Subcategory.
The Subcategory form opens.
- Define the fields.
Note: For more information, refer to the Service Form documentation.
- Create a new Service by clicking
File>New>New Service
from the
CSM Desktop Client menu bar or by clicking
New>New Service
on the
CSM Desktop Client toolbar.
- Activate your Service:
- In the Status alert bar, click
Set as Active.

- In the Status alert bar, click
Set as Active.
- After the SLA is activated, you have the following options:
- If you discover that work needs to be done on the SLA, click the Deactivate this SLA link in the I Want To section to temporarily disable it (Status changes to Inactive). The SLA can be reactivated by clicking the Set to Planning link in the Status alert bar.
- If the SLA is no longer applicable, click the Retire this SLA link in the I Want to section (Status changes to Retired). The SLA can be reactivated by clicking the Set to Planning link in the Status alert bar.